Showing posts with label recipe. Show all posts

Tuesday, November 23, 2010

Chocolate Covered Cherry Cookies

...say that three times fast.


The occasion was another potluck at work. In addition to making my mom's Sup Mang Cua (crab asparagus soup), I wanted to bake something. I found a recipe for chocolate covered cherry cookies in a holiday baking magazine at the library. If you know me, or go through this blog, you'll know that I am not a cookie baker. I usually outsource that--or have to be closely supervised.

But not one to be defeated by butter, eggs and flour, I gave it another try. On the sign-up list at work, I put myself down for the soup and "Dessert--to be a surprise!" Whether burnt or ambrosial, I suppose my coworkers were in for a surprise either way.

1. Cream 1/2 cup of butter with 1 cup of sugar, 1/4 tsp. of baking powder, 1/4 tsp. of baking soda, and 1/4 tsp. of salt. Beat in 1 egg and 1-1/2 tsp. of vanilla.


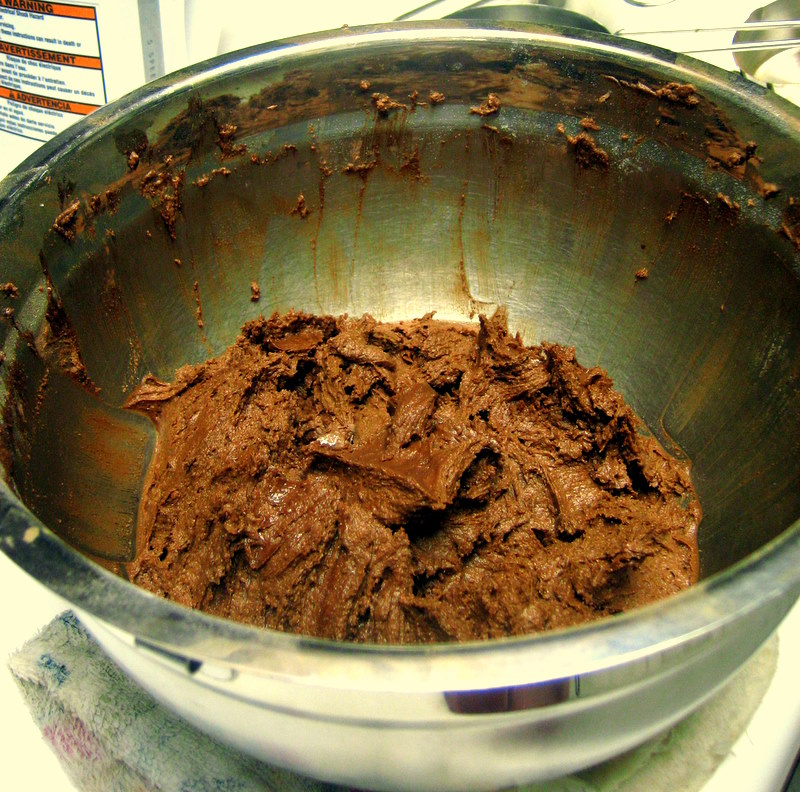
2. Add 1/2 cup of unsweetened cocoa powder. Stir in 1-1/2 cups of flour with a wooden spoon.


3. Shape dough into 1-inch balls, placed about 2-inches apart on cookie sheets. Press you thumb into the center of each ball and place a maraschino cherry in the center.

4. Meanwhile, make the frosting by warming 1/2 cup of sweetened condensed milk in a small saucepan and melt 1 cup of semisweet chocolate chips into it. Stir in about 4 tsps. of the juice drained from the cherries. Add more juice if the chocolate frosting is too thick.


5. Spoon a little bit of the frosting over each cherry. Bake about 10 minutes in a 350 degree (F). Let cool on the cookie sheet about a minute before transferring to a wire rack.


6. Eat.

Friday, July 2, 2010

Blueberry Cobbler = Summer's Official Arrival

Blueberries are in season here in central Pennsylvania--as well as plenty other places too, I'd imagine. In the off season, they go for $6-7 a pint. And because they have to be imported from somewhere warm in the winter time, they are usually picked before they are fully ripe--yielding sour berries with mealy texture.


By contrast, right now I can get two pints for $3 and in peak condition! They are so fresh and plump that every single berry is edible. I don't even have to pick them over and throw out mushy ones because there are none.

I decided to make a blueberry cobbler to bring over to my friend JoAnn's tonight.

Blueberry cobbler is something I was only recently introduced to; that is, a few summers ago, when I moved to New York. In Manhattan, one of the things I really liked were the fruit stands that dotted the city and which I would inevitably run into, on my way to a subway station. The fruit was of pretty good quality, at very reasonable prices. (And here I put the disclaimer of not discussing why the prices at these fruit stands were so cheap, i.e., labor costs, etc.) Anyway, a friend was incredulous that I had never had blueberry cobbler, or even very many fresh blueberries ever for that matter. So I decided to try it one day, using Baking Illustrated's recipe.

So simple; just cobbled together from ingredients you most likely have lying around anyway. All I had to do was run to the corner and get some blueberries from the street vendor. I don't think my friend ever really knew it, but a secret love affair was born.

I rarely like cooked fruit. For that reason, I rarely eat pie (although I love making it). But blueberry cobbler is perhaps the one dish where I like the cooked fruit more than the fresh fruit. And I always forget this.

But what I don't forget is the awe I discovered when I had my first bite of cobbler ever. How could it be that such humble ingredients (flour, buttermilk, cornmeal, baking powder/soda, sugar, pinch of salt) make something so rich? I love the royal color of the blueberry juices bubbling up; the texture of the cornmeal in the dough; the soft scent of cinnamon; and the way it all comes together with the juices soaking up into the dough.

Blueberry Cobbler (America's Test Kitchen)

Filling
  • 1/2 c. granulated sugar
  • 1 T. cornstarch
  • pinch ground cinnamon
  • pinch table salt
  • 6 C. fresh blueberries (30 ounces), picked over
  • 1-1/2  t. grated lemon zest
  • 1 T. lemon juice
Biscuit Topping
  • 1 C. unbleached all-purpose flour (5 ounces)
  • 2 T. cornmeal , stone-ground
  • 1/4 C. granulated sugar , plus 2 teaspoons for sprinkling
  • 2 t. baking powder
  • 1/4 t. baking soda
  • 1/4 t. table salt
  • 4 T. unsalted butter (1/2 stick), melted
  • 1/3 C. buttermilk
  • 1/2 t. vanilla extract
  • 1/8 t. ground cinnamon
    1. Preheat oven to 375 degrees.
    2. Stir sugar, cornstarch, cinnamon, and salt together in large bowl. Add berries and mix gently with rubber spatula until evenly coated; add lemon zest and juice and mix to combine. Transfer berry mixture to 9-inch glass pie pan, place pie pan on rimmed baking sheet, and bake until filling is hot and bubbling around edges, about 25 minutes.

    3. While blueberries are baking: Whisk flour, cornmeal, 1/4 cup sugar, baking powder, baking soda, and salt in large bowl to combine. Whisk melted butter, buttermilk, and vanilla in small bowl. Mix remaining 2 teaspoons sugar and cinnamon in second small bowl and set aside. One minute before berries come out of the oven, add wet ingredients to dry ingredients; stir with rubber spatula until just combined and no dry pockets remain.
    4. Remove berries from oven; increase oven temperature to 425 degrees.

    5. Pinch off 8 equal-sized pieces biscuit dough and place on hot berry filling, spacing them at least 1/2 inch apart (they should not touch). Sprinkle each mound of dough with cinnamon-sugar.

    6. Bake until filling is bubbling and biscuits are golden brown on top and cooked through, 15 to 18 minutes. Cool cobbler on wire rack 20 minutes and serve.

        Thursday, November 12, 2009

        Turkey Day - 3 Weeks Early!

        Due to unforeseen circumstances, I flew back to California for the second time in a month to see my family. My brother who is in the Army also was able to fly home. So once again, we were all together and, brilliantly, were able to celebrate Thanksgiving--albeit three weeks early!

        Usually, I do some kind of fancy bird (ask my brothers about the apple cider glazed turkey from one year. What? You don't like your gravy slightly sweet and cinnamon-y?) This year, we opted for traditional. Turkey, gravy, smashed potatoes, and a variety of roasted and steamed vegetables served with dinner rolls and cranberry sauce from a can!

        People really shouldn't be afraid of making Thanksgiving dinner. There are 3 keys to turning out the perfect turkey--and they are very easy to achieve.

        (1) Brine the turkey. I even brined and defrosted in one step: buy the turkey, which is usually frozen. Dissolve 1 cup of salt per 1 gallon of water. For a 14 pound turkey, I used about 2 gallons. Submerge the turkey in the brine for a day, refrigerated. It will be brined and defrosted by then.

        (2) Use a meat thermometer. Before roasting, stick the thermometer into the turkey's thigh without touching bone. Roast until the temperature reaches a minimum of 165 degrees. This is the only reliable way of making sure your turkey is cooked to a safe and delicious temperature.

        (3) Baste. In this year's case, I made it even simpler by creating a way for the turkey to baste itself. I formed a lattice of bacon over the breast of the turkey that would melt and baste the turkey as it roasted without me having to check on things every 20 minutes or so. I loosely tented foil around the bacon-latticed turkey and stuck it into a 350 degree oven.


        About half an hour before the turkey was done, I took the foil and the bacon off. I brushed the turkey with some herbed butter and let the bacon continue to crisp on the side in its own dish while the turkey browned.

        Easy peas-ey!

        Tuesday, September 22, 2009

        Green Tea CupKates

        My friend Uyen recently asked me to make cupcakes for her friend's bridal shower. She specially requested green tea cupcakes with strawberry mousseline buttercream frosting. I'd never made green tea cake before she asked for them. So a couple weeks ago, I whipped up a couple test batches.

        The first batch had just a little too much sugar, which made a big difference: the cakes baked too quickly, were too sweet, and did not rise enough. I decreased the sugar, added an egg yolk for smoother texture, and upped the green tea ("macha") powder, and the second test batch was much improved.

        The recipe I ended up using for the delivered batch is a twist off the classic white cake.

        To amp up the green tea flavor, I poured a green tea glaze over each cupcake. Half of the cupcakes were complemented by strawberry mousseline buttercream, the other half with vanilla mousseline buttercream and a touch of green tea for color.

        Recipe follows; however, this recipe is in weight measurements because I had to produce the recipe. (Weight measurements more accurately preserve the ratios necessary to produce successful cakes.)

        Green Tea CupKates
        (yields approximately 2 dozen cupcakes and maybe a few leftover to experiment/nibble on)
        • 9 ounces cake flour
        • 11 ounces granulated sugar
        • 4 tsps baking powder
        • 1 tsp salt
        • 1 tbsp green tea "macha" powder
        • 12 tbsps (1-1/2 sticks) unsalted butter, room temperature
        • 1 whole egg plus 2 egg whites, room temperature
        • another 3 egg whites, room temperature
        • 1 cup milk, room temperature
        • 1 tsp vanilla extract
        1. Preheat oven to 350 degrees F. Line muffin tins with 24 cupcake liners.

        2. In a large mixing bowl, combine the cake flour, sugar, baking powder and salt. Stir to mix evenly.

        3. Using a pastry blender (see image on the right), cut the butter into the flour mixture one tablespoon at a time. Continue blending until the butter and flour mixture resembles a wet sand texture, with lumps no larger than pea-sized and no dry flour streaks.

        4. Sprinkle the green tea “macha” powder over the mixture.

        5. In a 2-cup measuring cup, combine the milk, 1 whole egg plus 2 egg whites, and vanilla extract. Mix with a fork until just combined.

        6. In a medium bowl, whip the remaining three egg whites to medium peaks.

        7. Pour half the milk mixture into the butter and flour mixture. Stir quickly to combine evenly. Add the remaining milk mixture and stir again to combine evenly.

        8. Add a third of the beaten egg whites to the batter and fold to lightly combine. Add in the rest of the beaten egg whites and lightly fold to combine without deflating the egg white volume.

        9. Fill cupcake liners 2/3 full. Bake approximately 15-18 minutes until a toothpick inserted in the middle of a cupcake comes out dry with just a few crumbs clinging to it and the tops are barely golden.


        Green Tea Glaze
        (yields more than you'll ever need)


        • ½ cup sifted confectioner's sugar
        • 1 tbsp green tea “macha” powder
        • 3 tbsps milk
        Stir the ingredients together with a fork, in a figure-8 motion to avoid bubbles. Pour a teaspoonful over each cooled cupcake.


        Strawberry Mousseline Buttercream
        (yields about 5 cups, enough to generously frost 24 cupcakes)

        • 5 large egg whites
        • 3/4 cup sugar
        • 1 cup of fresh strawberries, washed and hulled
        • 2 cups unsalted butter, room temperature
        • 1 or 2 tsps vinegar
        • 1 tsp vanilla extract
        1. Place the vinegar on a paper towel and thoroughly wipe out your large mixing bowl. Put the egg whites in the bowl and start beating the egg whites with an electric hand mixer. When they reach soft peaks, gradually add 2 tablespoons of sugar and beat to stiff peaks.

        2. Puree the strawberries in a food processor until fine and almost smooth. Strain the juice twice and set aside. Set aside the strained, crushed strawberries.

        3. In a small heavy saucepan, heat together the rest of the sugar and 1/3 cup of the strawberry juice, stirring, until the sugar dissolves and the mixture is bubbling. Cook until a candy thermometer reaches 248-250 degrees F (the firm ball stage). Immediately remove the syrup from the heat.

        4. If using a handheld mixer, beat the syrup into the whites in a steady stream with the mixer running. Don't pour the syrup on the beaters or they will throw all the syrup on the sides of the bowl. Lower speed to medium and beat until completely cool. Mix in the vanilla extract.

        5. Beat in the butter 1 Tbs at a time. At first the mixture will seem thin and will look curdled, but keep adding butter and mixing well, you may need to increase the speed a bit.

        6. Add 2 tablespoons of the crushed strawberries to the finished buttercream and mix to distribute evenly.

        Buttercream becomes spongy on standing, mix again before using. If your buttercream has been chilled, you must allow it to come to room temperature before mixing or it will curdle.


        Monday, June 29, 2009

        Gluten-Free Chocolate Cupcakes

        My friend Amy saw my French Toast and Bacon CupKates the other week and was so bummed she couldn't have one because she is allergic to wheat. Well, this past weekend, we all had a picnic and I decided to try making gluten-free cupcakes.

        Very interesting.

        I never realized how complicated a gluten-free life can be! Gluten can show up in some of the unexpected of ingredients: soy sauce, tomato soup, beer, pudding.... Read more about it here. It used to be that in order to create gluten-free baked goods, you had to mix half a dozen types of flours in precise proportions and add some kind of gum to simulate the texture that gluten produces. Luckily, now there are brands of "all-purpose" gluten-free flour mixes that take out the guesswork. But the finished product between a cupcake baked with regular flour and one baked with gluten-free flour is often still detectable. But what an adventure!

        Turns out that the chocolate cupcakes tasted pretty good. (I think Amy had two and took one to go!) They were moist, but noticeably more crumbly than regular cupcakes. And they didn't rise with little mounds like regular cupcakes do. They did rise but were pretty flat on top.

        When following the recipe below, it's important to not fill the cupcake liners too full because they will rise over the cups and will be impossible to remove without destroying them.

        Ingredients:

        • 3/4 cup (1-1/2 sticks) butter
        • 2-1/2 cups sugar
        • 3 eggs, plus 1 egg yolk
        • 2 cups gluten-free flour mix (I used the 365 brand from Whole Foods--$3.99/16 oz.)
        • 1 teaspoon baking soda
        • 1/2 teaspoon salt
        • 3/4 cup dark cocoa powder
        • 1 tablespoon instant coffee powder
        • 1-1/2 cups milk
        • 2 teaspoons vanilla
        • 1/4 cup Hershey's syrup

        Directions:

        1. Beat butter until softened. Add sugar and beat until light and fluffy.
          Add eggs, one at a time, beating after each addition.
        2. Combine the gluten-free flour, baking soda, salt, cocoa, and coffee powder into a medium bowl.
        3. Measure the milk, vanilla, and chocolate syrup into a small bowl.
        4. Starting with the dry ingredients, alternate adding the dry mixture and milk mixture to the butter/sugar while mixing, finishing with the dry.
        5. Fill cupcake molds about 2/3 full.
        6. Bake at 350 degrees for about 30-35 minutes or until tester comes out clean.
        7. Let them cool completely before frosting them.

        I frosted mine with vanilla mousseline buttercream and a royal icing dot.

        Sunday, June 28, 2009

        What to Do With Leftover Egg Yolks?

        With all the mousseline buttercream that I had been making, I kept ending up with extra egg yolks. What to do with them that would be yummy?

        Pastry cream.

        I have a really great recipe that virtually guarantees no lumps (thanks Baking Illustrated!) The trick lies in tempering the egg yolk mixture with the hot milk before adding the whole thing back into the saucepan to continue cooking. Because of this technique, I didn't even have to strain my pastry cream and it came out perfectly smooth.

        Pastry Cream (Makes about 3 cups)

        Ingredients:
        • 2 cups half-and-half
        • 1/2 cup sugar
        • Pinch salt
        • 5 large egg yolks
        • 3 tablespoons cornstarch
        • 4 tbsp. cold unsalted butter, cut into 4 pieces
        • 1 1/2 tsp. vanilla extract

        Directions:

        1. Heat half-and-half, 6 tablespoons of the sugar and the salt in a saucepan over medium heat until simmering, stirring occasionally to dissolve the sugar.
        2. Meanwhile, whisk egg yolks and remaining 2 tablespoons of sugar in a medium bowl until sugar begins to dissolve. Whisk in the cornstarch until combined and the mixture is pale yellow and thick.
        3. When the half-and-half mixture reaches a full simmer, gradually whisk half of that mixture into the yolk mixture to temper it. Stir to ensure even mixing. Return the mixture back to the saucepan; whisking constantly until a few bubbles burst on the surface and the mixture is thickened.
        4. Remove from heat and whisk in the butter and vanilla. (If needed, strain through a fine-mesh sieve).
        5. Let cool thoroughly, at least 3 hours.

        Then what? So I ended up making cream puffs to go with the pastry cream. Here they are puffing in the oven:


        Saturday, June 20, 2009

        Bacon Adventures: Delicious or Disaster?!

        Let me say it: Absolutely Delicious!

        Throughout the project, which my roommate Meaghan and I collaborated on, I kept convincing myself, "It's gonna be great; it's gonna be fine. Bacon makes everything better!" I have to admit, I had reservations. But as we added ingredient after ingredient, it made less and less sense that the recipe would turn out to be a disaster. Eggs? Flour? Sugar? Cinnamon? Nutmeg? Vanilla? Butter? Bacon fat? Who has any objections to these things? As it turns out, no one should.

        The cake was light and moist, with an enveloping aroma of ... Christmas (because of the freshly grated nutmeg and cinnamon)! It was like breakfast french toast, only better. The bits of bacon in the cake were like a tastebud surprise, the saltiness of which contrasted so perfectly with the actual cake.

        I'd mentioned in my last post about ambitions to create a mousseline buttercream from maple syrup. It was work. And the whole time, I kept thinking, "This will either be totally awesome or totally disastrous." Totally awesome if the maple syrup can reach a high enough temperature (240 degrees F) without burning. Totally disastrous if it burns into a black mess. It took a long time, but it finally did reach barely 240 degrees. And as always, the mousseline recipe never fails.

        French Toast with Bacon CupKates (Yields about 16)

        Ingredients:

        • 10 tbsp unsalted butter, at room temperature
        • 3/4 cup sugar
        • 2 tbsp bacon drippings (solidified in refrigerator)
        • 1 ½ cups cake flour, sifted
        • 1 ½ teaspoons baking powder
        • 1/4 teaspoon salt
        • 1 teaspoon fresh grated nutmeg
        • 1 teaspoon cinnamon
        • 1/2 cup milk, at room temperature
        • 2 tbsp maple syrup
        • 1 ½ teaspoon vanilla extract
        • 3 large eggs, at room temperature, separated
        • 1/4 cup of crumbled bacon pieces
        Directions:

        1. Place a rack in the middle of the oven and preheat to 375 degrees F. Line the muffin pan with paper cupcake liners. Fry 8 slices of bacon to a crisp, reserve 2 tbsp of the drippings. Crumble the bacon and save for later.
        2. Combine the butter, bacon drippings and sugar and mix on low speed with a mixer until just incorporated. Raise the speed to high and mix until light and fluffy, about 10 minutes. (Occasionally turn the mixer off, and scrape the sides of the bowl down with a rubber spatula.)
        3. Meanwhile, in a medium bowl, sift together the flour, baking powder, salt, nutmeg, and cinnamon. Set aside. In a small bowl, whisk together the milk, maple syrup and vanilla, and also set aside.
        4. Add the egg yolks to the creamed butter one at time, waiting for each one to be fully incorporated before adding the next. Reduce the speed of the mixer to low. Alternately, add the flour mixture in 3 additions and the milk mixture in 2 additions, waiting for each to be fully incorporated before adding the next (scrape the bowl down occasionally). Raise the speed to medium and mix briefly until a smooth batter is formed. Transfer the batter to a large bowl. Sprinkle in the bacon bits and stir to incorporate.
        5. In another clean (oil/grease-free) bowl, whip the egg whites until stiff peaks are formed. Working in 3 batches, using a rubber spatula, fold the egg whites into the batter, until just incorporated. Fill each cupcake liner 3/4 full of batter.
        6. Bake, rotating the pan once, until golden brown and a toothpick inserted in the center of the cakes comes out clean, about 30 minutes.
        7. Remove the cupcakes from the oven and cool completely. Frost with Maple Syrup Mousseline Buttercream. Garnish with a piece of bacon.

        Maple Syrup Mousseline Buttercream

        Ingredients:

        • 1 cup unsalted butter, softened but cool (about 65 degrees F)
        • 1/4 cup sugar
        • 3/4 cup of maple syrup, Grade A Dark Amber
        • 3 large egg whites
        Directions:

        1. Make sure your mixing bowl is very clean and free of grease or oily residue. To be sure, you can wipe your bowl down with a teaspoon of vinegar. Set the bowl aside.
        2. In another mixing bowl, beat the butter until smooth and creamy, set aside in a cool place.
        3. In a small heavy saucepan, heat the maple syrup over low to medium-low heat. Watch out that it does not boil over. Very important.
        4. Start beating the egg whites, when they reach soft peaks, gradually add the sugar and beat to stiff peaks. If using a stand mixer, leave it running on the slowest speed to keep the egg whites from deflating.
        5. Increase the heat under the syrup and cook until a candy thermometer reaches 240 degrees F (the soft ball stage). Be patient. It takes vigilence to make sure that the syrup heats and thickens without boiling over or burning. It may take up to 30 minutes over low heat.
        6. Once 240 degrees is reached, immediately remove the syrup from the heat. If using a handheld mixer, beat the syrup into the whites in a steady stream with the mixer running. Don't pour the syrup on the beaters or they will throw all the syrup on the sides of the bowl. If using a stand mixer, pour 1/4 of the mixture over the whites with the mixer off. Immediately beat at high speed for 5 seconds. Continue with the remaining syrup. Lower speed to medium and beat until completely cool.
        7. Beat in the butter 1 Tbs at a time. At first the mixture will seem thin and will look curdled, but keep adding butter and mixing well, you may need to increase the speed a bit.


        I promise you will love it!